
Hi there,
I hope you enjoyed yesterday's post and video. Today I'm back with Part 2 to show you how to construct the stack of boxes to create your Advent Calendar. Here is the calendar I started to make on yesterday's video:
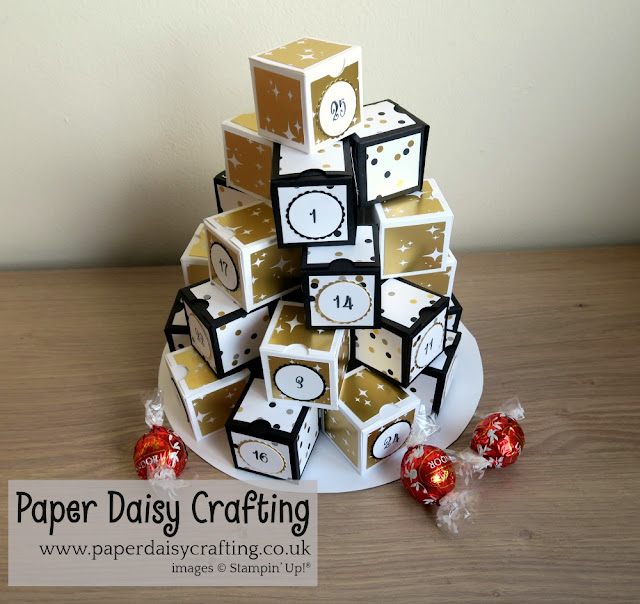
Did you notice I changed the base from square to circle? It looks so much better! I just found a plate in my cupboard which was the right size (approx 21cm diameter), drew round it and cut it out.
Today's video tutorial shows you how to glue the boxes together securely to make the stack! If you have a glue gun, then it might be useful but I don't and it worked fine without! To watch the video just click HERE or on the image below:
Do come back tomorrow and we'll finish off the advent calendar by adding on the numbers. See you then,

All the products I have used to make this project are all available from my online shop. Simply click "Shop Now" button on the top of this page or click any of the images below to go direct to that item in my online Stampin’ Up! shop. If you order from my online shop please use my monthly shopping code (below) to receive a free thank you gift from me as I really appreciate your business. (If your order is £150 or more then please do not use my code as you will earn Stampin' Rewards in your own right and can choose your own freebies!)

If you would prefer a more personal service, have any questions or need help with your order, please either send me an email or give me a ring. I'll be more than happy to help. You can also find me on Facebook, Instagram, Pinterest and YouTube - links on the left of this page.
Product List I hope you enjoyed yesterday's post and video. Today I'm back with Part 2 to show you how to construct the stack of boxes to create your Advent Calendar. Here is the calendar I started to make on yesterday's video:

Did you notice I changed the base from square to circle? It looks so much better! I just found a plate in my cupboard which was the right size (approx 21cm diameter), drew round it and cut it out.
Today's video tutorial shows you how to glue the boxes together securely to make the stack! If you have a glue gun, then it might be useful but I don't and it worked fine without! To watch the video just click HERE or on the image below:
Do come back tomorrow and we'll finish off the advent calendar by adding on the numbers. See you then,
All the products I have used to make this project are all available from my online shop. Simply click "Shop Now" button on the top of this page or click any of the images below to go direct to that item in my online Stampin’ Up! shop. If you order from my online shop please use my monthly shopping code (below) to receive a free thank you gift from me as I really appreciate your business. (If your order is £150 or more then please do not use my code as you will earn Stampin' Rewards in your own right and can choose your own freebies!)

If you would prefer a more personal service, have any questions or need help with your order, please either send me an email or give me a ring. I'll be more than happy to help. You can also find me on Facebook, Instagram, Pinterest and YouTube - links on the left of this page.


 Scallop Circle Punch")


No comments:
Post a Comment