
Hi everyone,
Today's project is one I've been wanting to make for a long time. I have been building up quite a stash of 6" x 6" patterned paper stacks and was struggling to find a good way to store them. Then I remembered that Crafty Caroline (before she sadly decided to step down from being a Stampin' Up! demo) had made a magazine style storage box for her papers. So I looked back through her blog, used her template and made my own!
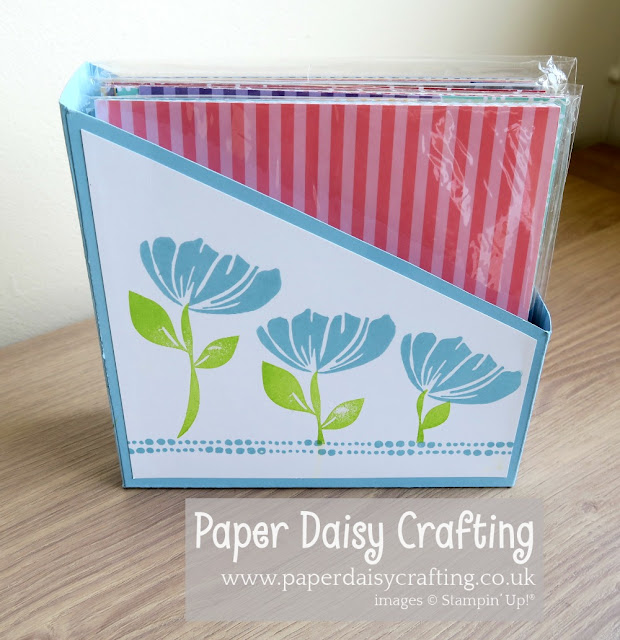
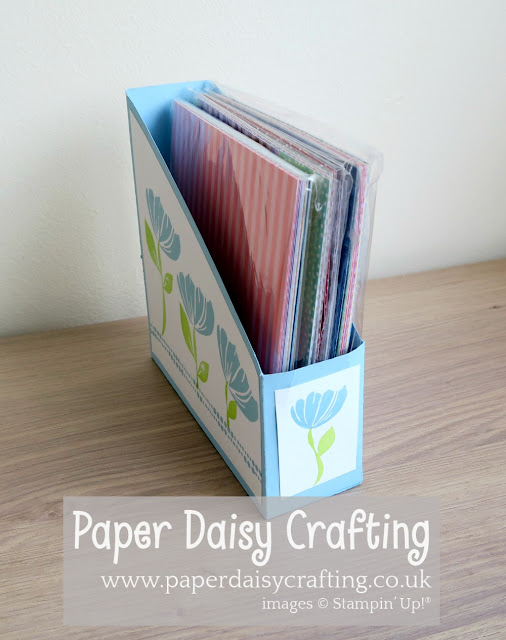
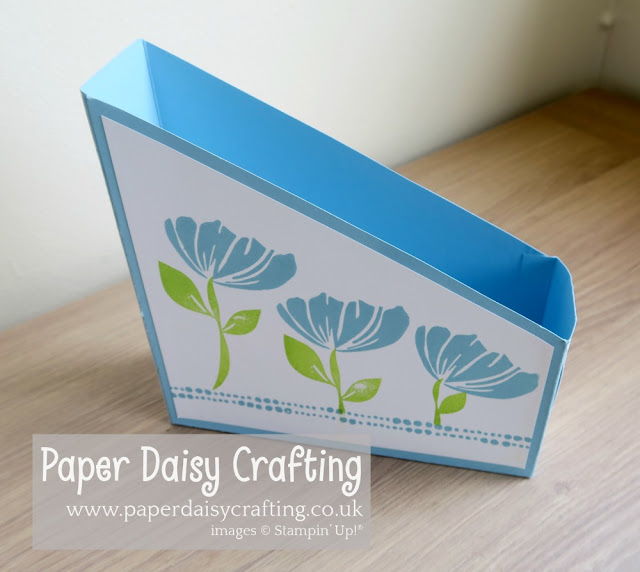
I tweaked a couple of things with my box so decided to make a video to show you how to make it. In fact I made two videos. The first one shows you how to put the box together, the second shows how I decorated it. You can watch the first one HERE or by clicking on the image below.
I'll be back with the second video tomorrow. But meanwhile here are the templates for the two parts of the box.


And here are the measurements you'll need. I made my boxes using the Imperial measurements. I did say on the video that I would give the Metric measurements too, but when I tried it I found that translating from Imperial to Metric just did not quite work.
IMPERIAL
Cardstock - 2 pieces measuring 8 3/4" x 8 1/4"
With the shortest side along the top, score at 2"
Turn the cardstock clockwise, a quarter turn and score at 1/2" and 2 1/2"
Do this on both pieces.
On one piece, place back on the scoreboard with the 8 1/4" side at the top (with the 1/2" scoreline at the bottom) and make a notch at 5 1/2". Draw a pencil line from the notch to the top of 2 1/2" scoreline and cut along the line.
On the other piece, place back on the scoreboard with the 8 1/4" side at the top (and the 1/2" score line at the top. Score at 5 1/2" to the 2 1/2" scoreline. Draw a line from where the short scoreline ends to the opposite top corner and cut along the line.
Use the templates shown to cut the pieces in appropriate place.
I'll be back tomorrow to show you how to decorate your storage box. Please come back for that!

All the products I have used to make this project are all available from my online shop. Simply click "Shop Now" button on the top of this page or click any of the images below to go direct to that item in my online Stampin’ Up! shop. If you order from my online shop please use my monthly shopping code (below) to receive a free thank you gift from me as I really appreciate your business. (If your order is £150 or more then please do not use my code as you will earn Stampin' Rewards in your own right and can choose your own freebies!)

If you would prefer a more personal service, have any questions or need help with your order, please either send me an email or give me a ring. I'll be more than happy to help. You can also find me on Facebook, Instagram, Pinterest and YouTube - links on the left of this page.
Product List Today's project is one I've been wanting to make for a long time. I have been building up quite a stash of 6" x 6" patterned paper stacks and was struggling to find a good way to store them. Then I remembered that Crafty Caroline (before she sadly decided to step down from being a Stampin' Up! demo) had made a magazine style storage box for her papers. So I looked back through her blog, used her template and made my own!


I tweaked a couple of things with my box so decided to make a video to show you how to make it. In fact I made two videos. The first one shows you how to put the box together, the second shows how I decorated it. You can watch the first one HERE or by clicking on the image below.
I'll be back with the second video tomorrow. But meanwhile here are the templates for the two parts of the box.


And here are the measurements you'll need. I made my boxes using the Imperial measurements. I did say on the video that I would give the Metric measurements too, but when I tried it I found that translating from Imperial to Metric just did not quite work.
IMPERIAL
Cardstock - 2 pieces measuring 8 3/4" x 8 1/4"
With the shortest side along the top, score at 2"
Turn the cardstock clockwise, a quarter turn and score at 1/2" and 2 1/2"
Do this on both pieces.
On one piece, place back on the scoreboard with the 8 1/4" side at the top (with the 1/2" scoreline at the bottom) and make a notch at 5 1/2". Draw a pencil line from the notch to the top of 2 1/2" scoreline and cut along the line.
On the other piece, place back on the scoreboard with the 8 1/4" side at the top (and the 1/2" score line at the top. Score at 5 1/2" to the 2 1/2" scoreline. Draw a line from where the short scoreline ends to the opposite top corner and cut along the line.
Use the templates shown to cut the pieces in appropriate place.
I'll be back tomorrow to show you how to decorate your storage box. Please come back for that!
All the products I have used to make this project are all available from my online shop. Simply click "Shop Now" button on the top of this page or click any of the images below to go direct to that item in my online Stampin’ Up! shop. If you order from my online shop please use my monthly shopping code (below) to receive a free thank you gift from me as I really appreciate your business. (If your order is £150 or more then please do not use my code as you will earn Stampin' Rewards in your own right and can choose your own freebies!)

If you would prefer a more personal service, have any questions or need help with your order, please either send me an email or give me a ring. I'll be more than happy to help. You can also find me on Facebook, Instagram, Pinterest and YouTube - links on the left of this page.


Those boxes are really pretty!! Thank you for all of your easy-to-follow videos!
ReplyDeleteThanks Laurie :) Glad they are useful.
ReplyDeleteSuper easy to make. Thank you Jill for sharing. Going to make some as gifts for stamping friends.
ReplyDelete