Showing posts with label wedding card. Show all posts

Saturday, 11 September 2021

Stamping INKspirations September Blog Hop - Lifetime Celebrations


Hi everyone,

Welcome to my blog. Thanks so much for popping in to see me. I'm here today with my offering for the Stamping Inkspirations blog hop.


For this month our theme is "Lifetime Celebrations" and I decided to go with one of the happiest and make a wedding card.


As soon as I saw the Gingerbread dies I could see the possibilities of using the bell for something other than Christmas projects and I think it works well on a wedding card - don't you?


How pretty is that border die - I think it adds the perfect finishing touch to my card. 


I always think of white and silver for wedding cards but this card would work well in any colours - it could even be made to coordinate with the colour theme of the wedding in question!

I do hope you'll carry on hopping around the other blogs to see all the inspiration everyone has for you. Next up is my good friend Gez - I'm sure she has something fabulous for you!


Here is the complete list of everyone taking part if you need it. 


Angie McKenzie  ●  Libby Fens  ●  Karen Henderson

AurĂ©lie Fabre  ●  Mo Rootes  ●  Tricia Butts

Jan Musselman  ●  Danielle Kassing  ●  Anne Krucek

 Shel Anderson  ●  Elaine de Montmorency

Jill Chapman  ●  Gez Carpenter  ●  Terry Hamilton

Rochelle Laird-Smith  ●  Annette Ball  ●  Leonie Stuart


I'll be back really soon with a video to show you how I made my card - please do pop back to see it.

Bye for now, back soon,


If you'd like to make sure you don't miss any of my posts or projects, just sign up for email notifications by clicking the green button below. You will receive an email to confirm your email address which you will need to click on to complete the sign up. This email may go to your spam folder so do please check there after you sign up.  Once signed up, you'll receive an email each time I publish a post. You can unsubscribe at any time! 


All the products I have used to make this project are available from my online shop. Simply click "Shop Now" button on the top of this page or click any of the images below to go direct to that item in my online Stampin’ Up! shop. If you order from my online shop please use my monthly shopping code (below) to receive a free thank you gift from me as I really appreciate your business. (If your order is £150 or more then please do not use my code as you will earn Stampin' Rewards in your own right and can choose your own freebies!)


If you would prefer a more personal service, have any questions or need help with your order, please either send me an email or give me a ring. I'll be more than happy to help. You can also find me on Facebook, Instagram, Pinterest and YouTube - links on the left of this page.

Product List

Sunday, 4 October 2020

Beautiful Friendship Wedding Card


Hello there crafters,

I hope you're having a great Sunday. Do you remember a few weeks ago I showed you the card I made for my daughter and her fiance on what would have been their wedding day, if Covid 19 hadn't intervened? I promised I would be back with a video tutorial and today I am bringing you that tutorial - sorry it has taken me so long!


This is the card I made on the video - I changed it to a "proper" wedding card - on the previous one I tweaked the wording to read "nearly weds" rather than "newly weds".


For those of you who asked, the fonts I used to print the sentiment are called Priscilla Script and Copperplate Light.

The stamp set I used is called Beautiful Friendship - it's a really lovely set and is so easy to make gorgeous detailed images with it. 


You can see how I decorated the envelope on the first photo and here is the inside of the card:


And so, you can watch the video by CLICKING HERE or on the image below.


Personalised cards like this are always great for special occasions and printing out a sentiment is really easy. Give it a try!

Back soon with more crafty inspiration,


All the products I have used to make this project are available from my online shop. Simply click "Shop Now" button on the top of this page or click any of the images below to go direct to that item in my online Stampin’ Up! shop. If you order from my online shop please use my monthly shopping code (below) to receive a free thank you gift from me as I really appreciate your business. (If your order is £150 or more then please do not use my code as you will earn Stampin' Rewards in your own right and can choose your own freebies!)

If you would prefer a more personal service, have any questions or need help with your order, please either send me an email or give me a ring. I'll be more than happy to help. You can also find me on Facebook, Instagram, Pinterest and YouTube - links on the left of this page.

  Product List

Saturday, 12 September 2020

Joy of Sets September blog hop - weddings

Hello everyone and thank you for joining me today for the Joy of Sets September blog hop. Our theme for this month is "Weddings" which, I have to admit touched a bit of a nerve for me as on this very day, my gorgeous oldest daughter Jess should have been getting married to her lovely fiance, Louis. Sadly, way back in April, whilst the UK was in lockdown, and planning and organising a wedding was just about impossible, we had to make the decision to postpone until a time when  it will more possible to do it properly - heaven knows when that might be! Today, in the UK, the sun is shining brightly which makes it all the more difficult - I was kind of hoping it would pour with rain!
Anyway, on to my project. I hope this still fits the theme - it is the card I made to give to Jess and Louis today, to let them know that we are as sad as they are about the abandoned plans. I have used a play on words by using "nearly weds" rather than "newly weds", but this could easily be changed to make an actual wedding card!


The colour scheme for the wedding had already been decided - burnt orange and dark teal - and I had designed the invitations with these colours although thankfully they had not been sent out. As a Stampin' Up! demo, the choice of colours was easy - Pretty Peacock (deep teal), Pumpkin Pie (orange) with a little bit of Cajun Craze (burnt orange). 


I used the stamp set Beautiful Friendship for the invitations so went with this as well for this "no wedding" card. The personalised sentiment was printed as I didn't have an appropriate stamp!


Of course, I decorated the envelope and the inside of the card too. 


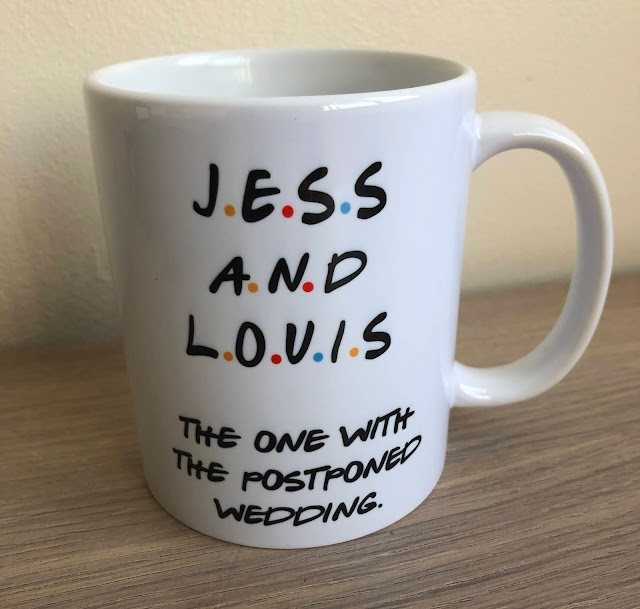
The happy couple have plans to do a few nice things together today so we won't be seeing them, but I sent though a few things for them to mark the occasion, including this Friends inspired mug!


I hope you like my project. So many wedding plans have been disrupted this year - so sad for all those couples. 

But there are loads of wedding inspired projects for you to see in our blog hop today. Please carry on hopping by clicking the "Next" image which will take you to see what fabulous project Lisa Mackey has for you. 
And here is the complete blog roll, just in case you get lost! 

September 2020 Blog Roll

Jill Chapman

Lisa Mackey

Angie McKenzie

Pia Gerhardt

Fiona Whitehead

Tricia Butts

Gez Carpenter

Sue Allen

Cheryl Taylor

Susan Webster

Libby Fens

Mo Rootes

JoAnn Pollock

Linda Moore


Please pop in and see me again over the next few days when I will have a video tutorial for you showing how I made my card. And if you'd like to buy any of the products used, please CLICK HERE

Meanwhile, happy crafting!


Saturday, 12 October 2019

Exploding Box Wedding Card With Meant to Be and Stitched Be Mine - Part Two

Hi everyone,

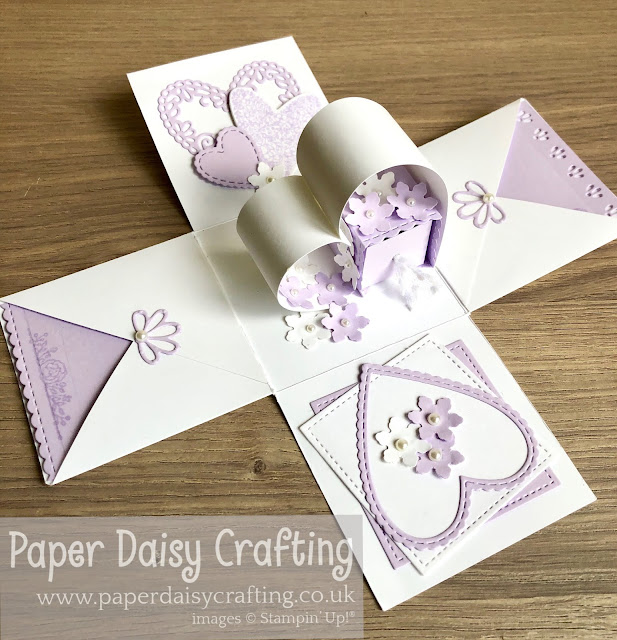
Did you like the project yesterday? Did anyone have a go? As promised, I am back today with Part Two, in which I show you how to decorate all of the inside panels and the lid. Just a reminder, here is the box:

Meant to Be Stitched Be Mine Stampin Up Exploding Box

Meant to Be Stitched Be Mine Stampin Up Exploding Box

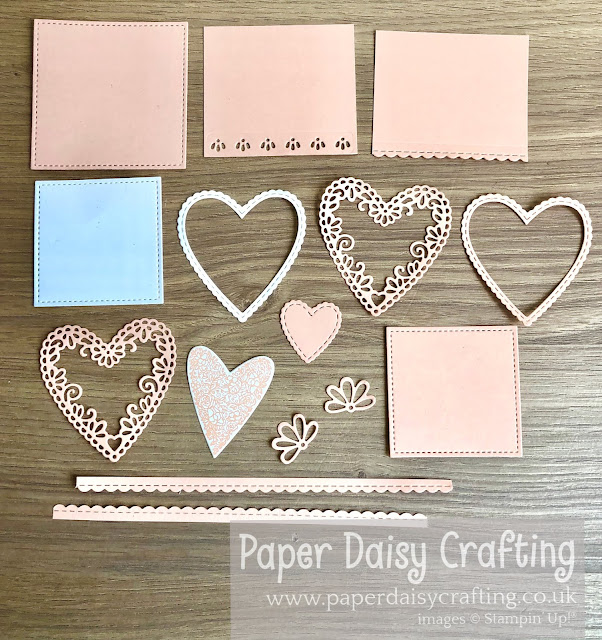
As I say in the video, I have made a visual for all the die cut pieces you will need for the decoration. 
Meant to Be Stitched Be Mine Stampin Up Exploding Box

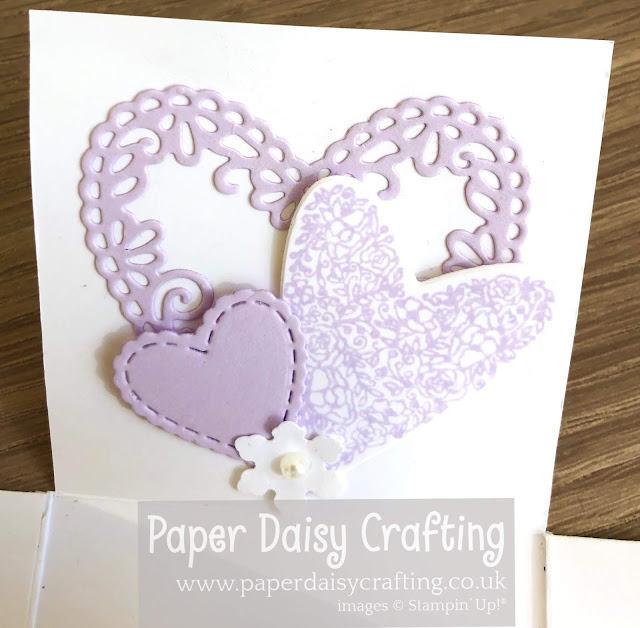
And here are each of the panels in close up. 

Meant to Be Stitched Be Mine Stampin Up Exploding Box

Meant to Be Stitched Be Mine Stampin Up Exploding Box


Meant to Be Stitched Be Mine Stampin Up Exploding Box

Meant to Be Stitched Be Mine Stampin Up Exploding Box

And the lid! 

Meant to Be Stitched Be Mine Stampin Up Exploding Box

So ready for the video tutorial? Just CLICK HERE or on the image below.


Back tomorrow with the third and final part. 

All the products I have used to make this project are available from my online shop. Simply click "Shop Now" button on the top of this page or click any of the images below to go direct to that item in my online Stampin’ Up! shop. If you order from my online shop please use my monthly shopping code (below) to receive a free thank you gift from me as I really appreciate your business. (If your order is £150 or more then please do not use my code as you will earn Stampin' Rewards in your own right and can choose your own freebies!)


If you would prefer a more personal service, have any questions or need help with your order, please either send me an email or give me a ring. I'll be more than happy to help. You can also find me on Facebook, Instagram, Pinterest and YouTube - links on the left of this page.

Product List